Introduction
Workspace Privileged Access is to gain temporary elevated permissions to perform administrative tasks. Access is logged and time limited for security compliance. This document explains what the Workspace Privileged Access is, why you need it and how you can obtain it.
Why do the Research Support need Workspace Privileged Access Management?
As a Research Support (RS) member, you may occasionally need access to a workspace you are not part of, for example for administrative tasks or troubleshooting. To support this in a secure way, we use time‑boxed, auditable elevation to the workspace’s Privileged Member role. This allows RS to perform the required management tasks and then cleanly hand over control to the Workspace Accountable and Privileged members without retaining any standing privileges. Workspace Privileged Access is managed in the Admin portal and grants Research Support immediate, temporary access to a specific workspace. This ensures that RS members can provide operational support efficiently while minimizing security and compliance risks.
Difference between Privileged Access and being a Privileged Member
It is important to understand the difference between Privileged Access and the Privileged Member role when you work with elevated permissions through PAM (Privileged Access Management).
- Normally, you only have access to a workspace if you are explicitly added to it by an Accountable or Privileged Member and you sign in with your
@mydrecredentials in the User Portal. - When you activate PAM in the Admin Portal, you instead sign in to the workspace with your guest‑account credentials (your own account).
Activate Privileged Access
To activate Workspace Privileged Access:
- Open the Admin Portal and sign in with your RS account.
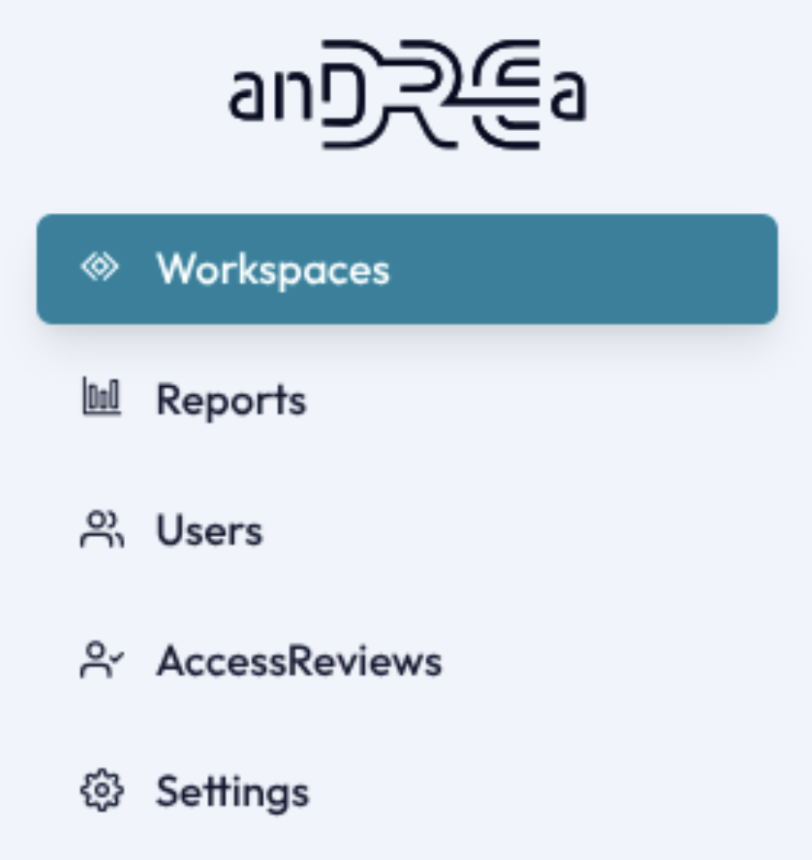
- In the left navigation, select Workspaces.
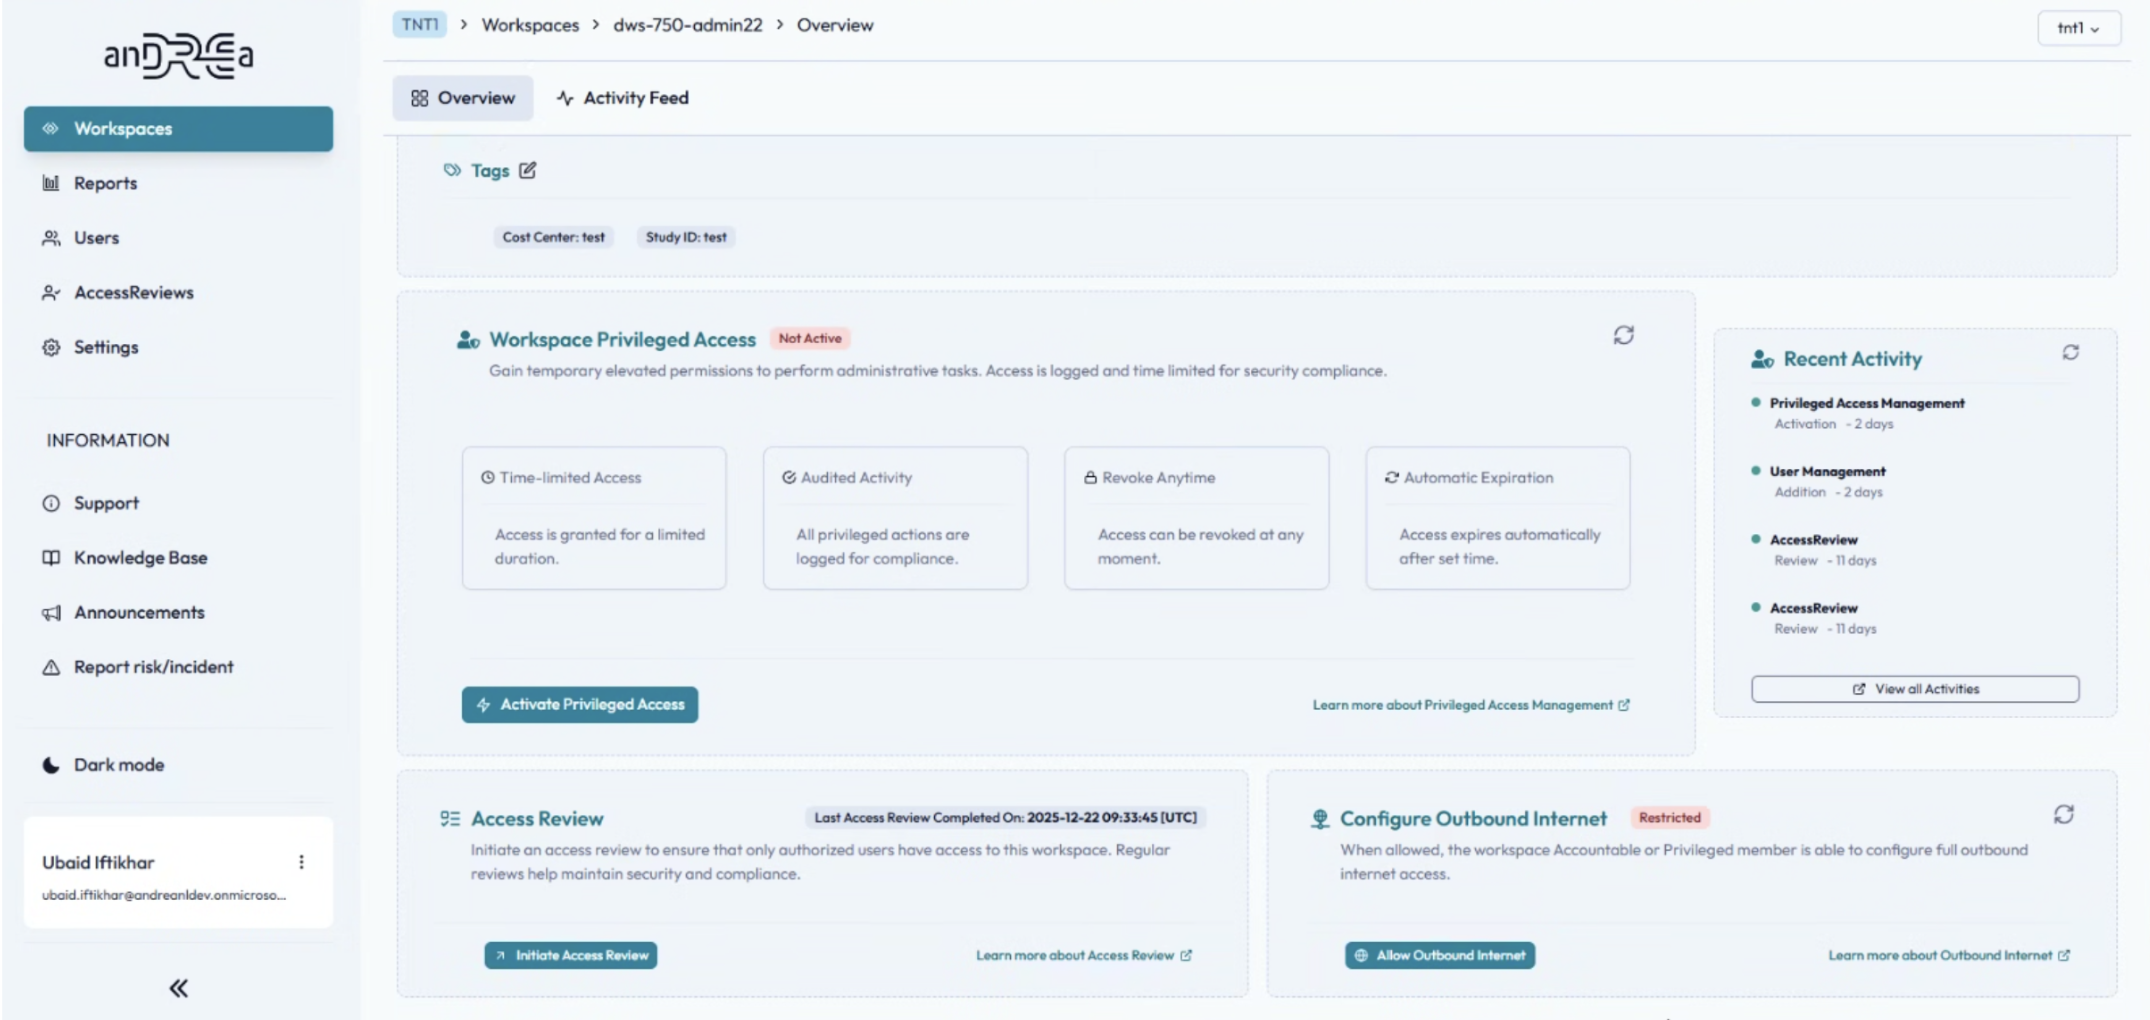
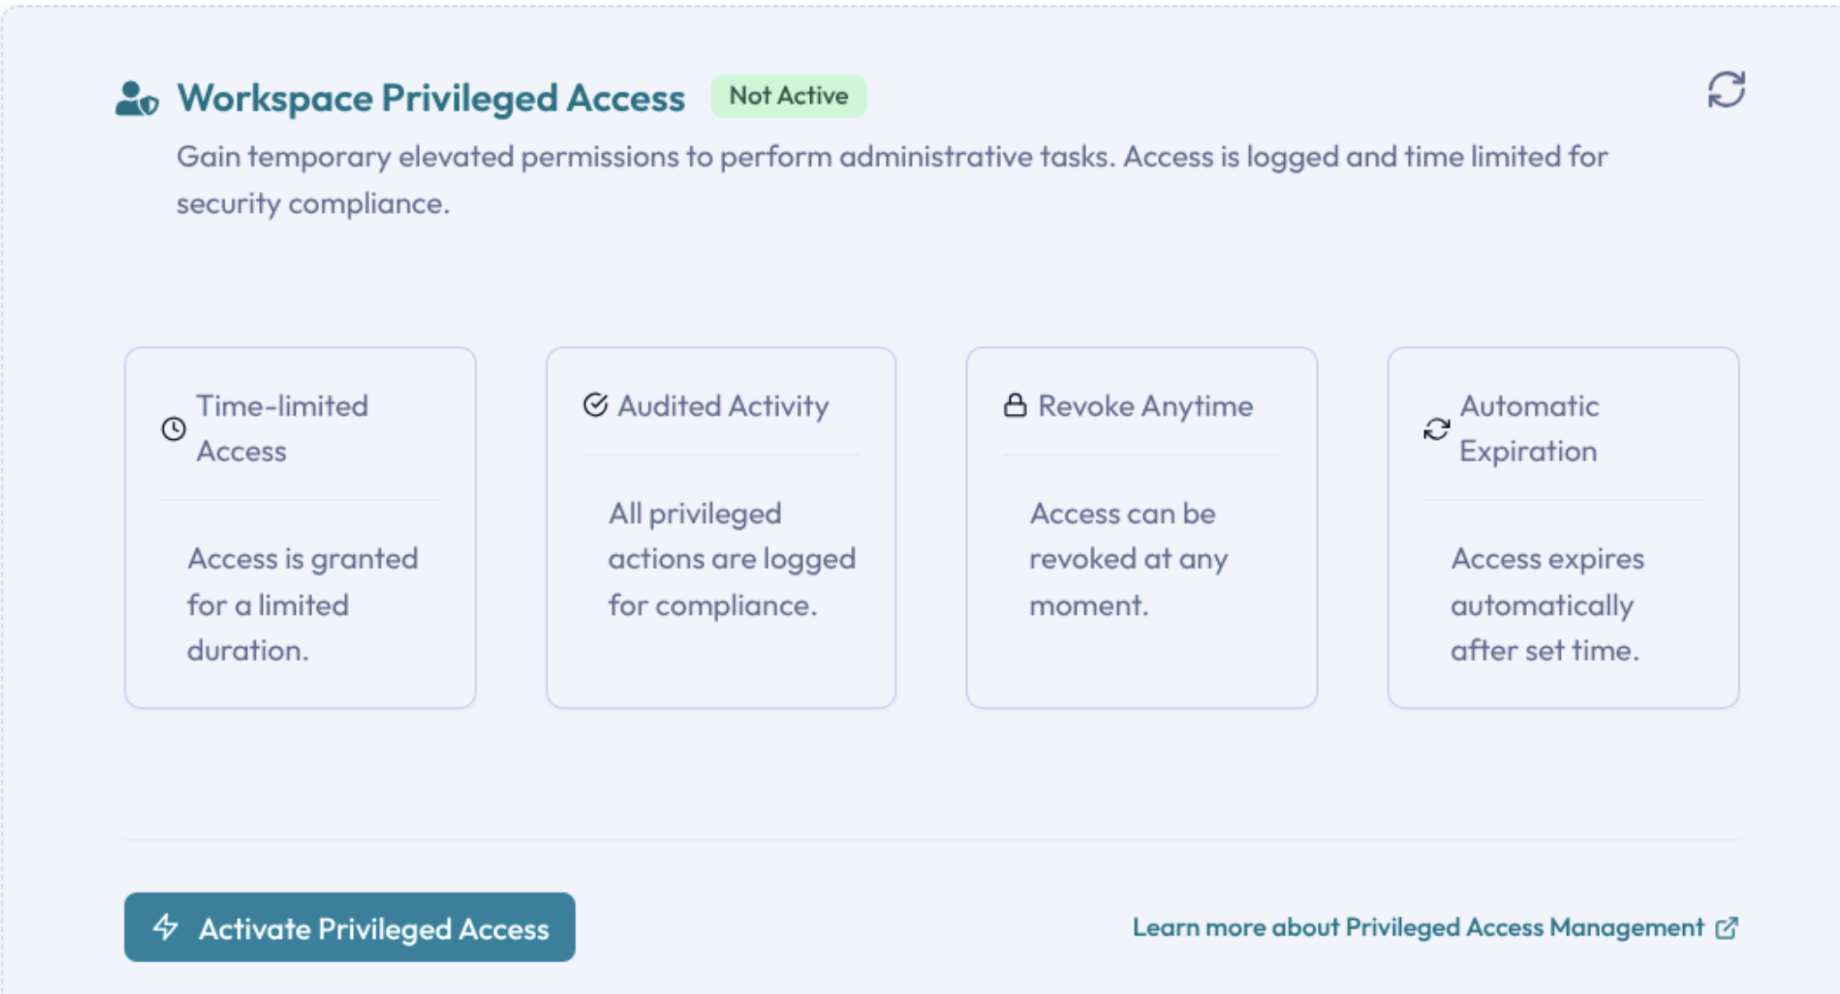
- Navigate to the relevant workspace and click Activate Privileged Access.
- In the elevation screen, enter a clear, valid reason (e.g. support ticket ID) for requesting Workspace Privileged Access. This justification is stored in the audit logs and can be used for audit purposes.
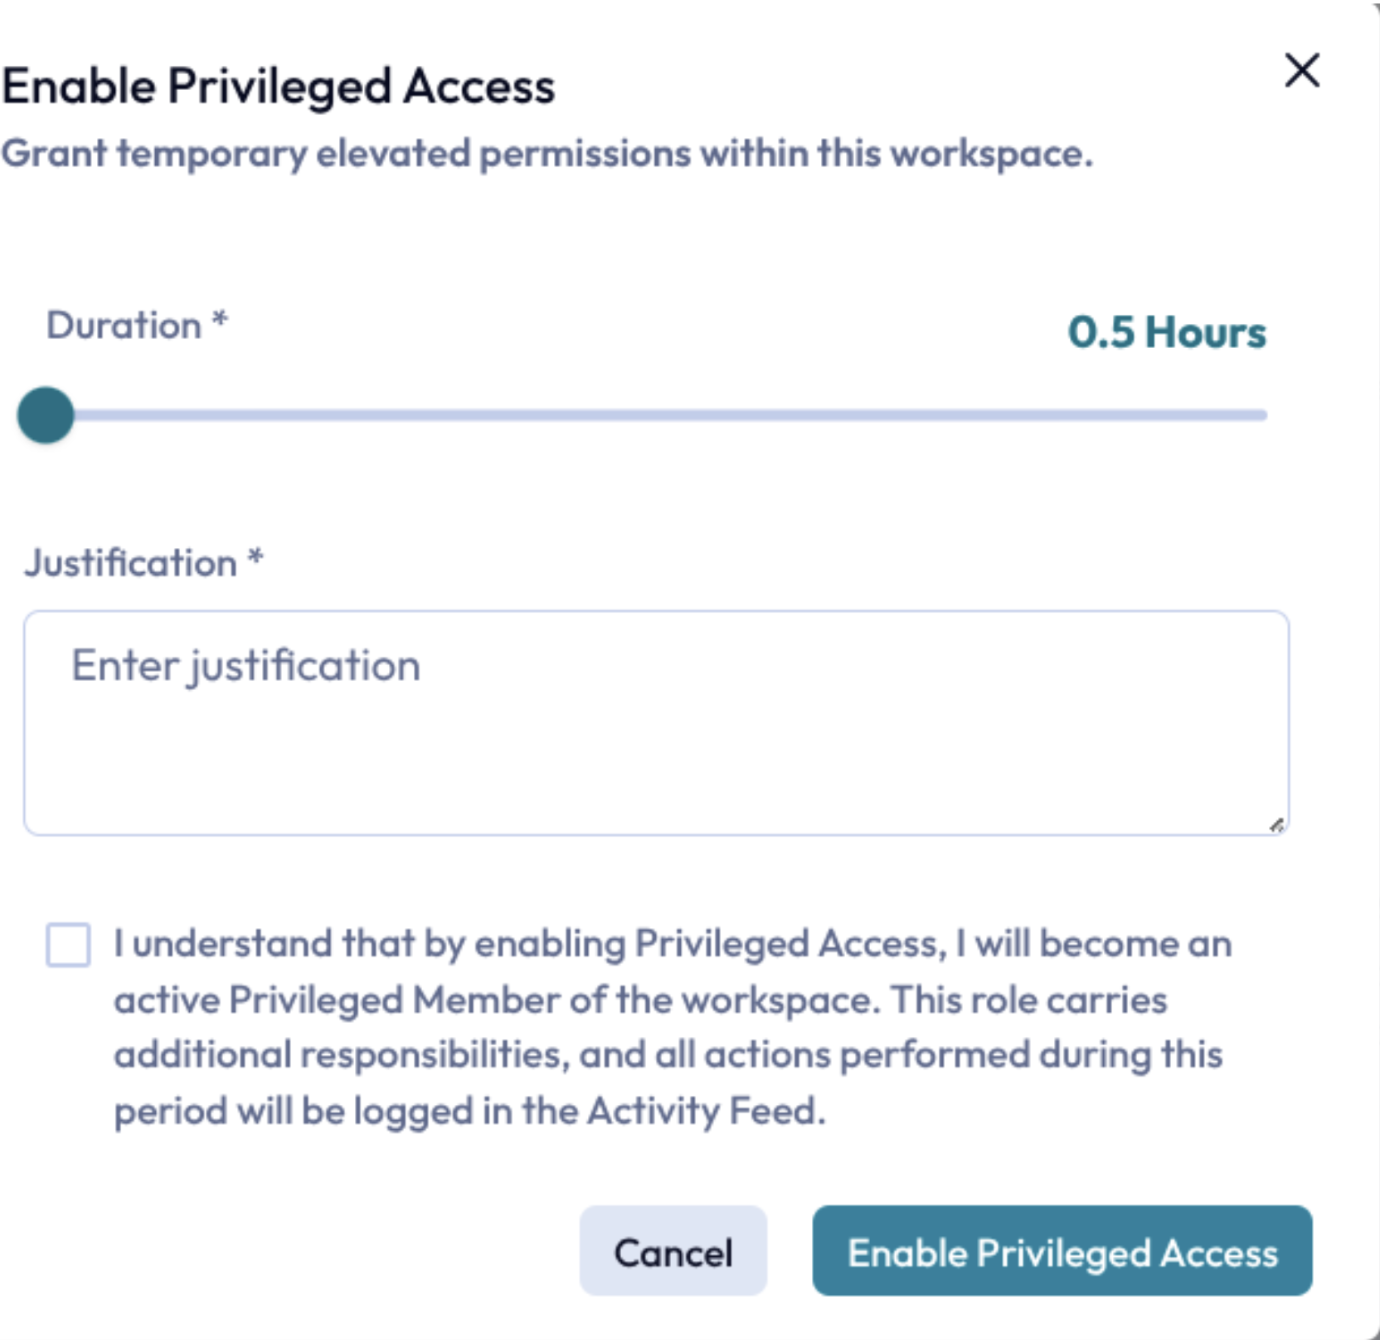
- Set the duration for which you need elevated access. Try to minimize the access as much as possible by choosing a time frame that is sufficient for the tasks you are planning to perform. After this time, your access will automatically expire.
- Review the details and confirm to activate your elevated access.
- It takes a moment to assign the elevated privileges, once done, you can close the pop-up window.
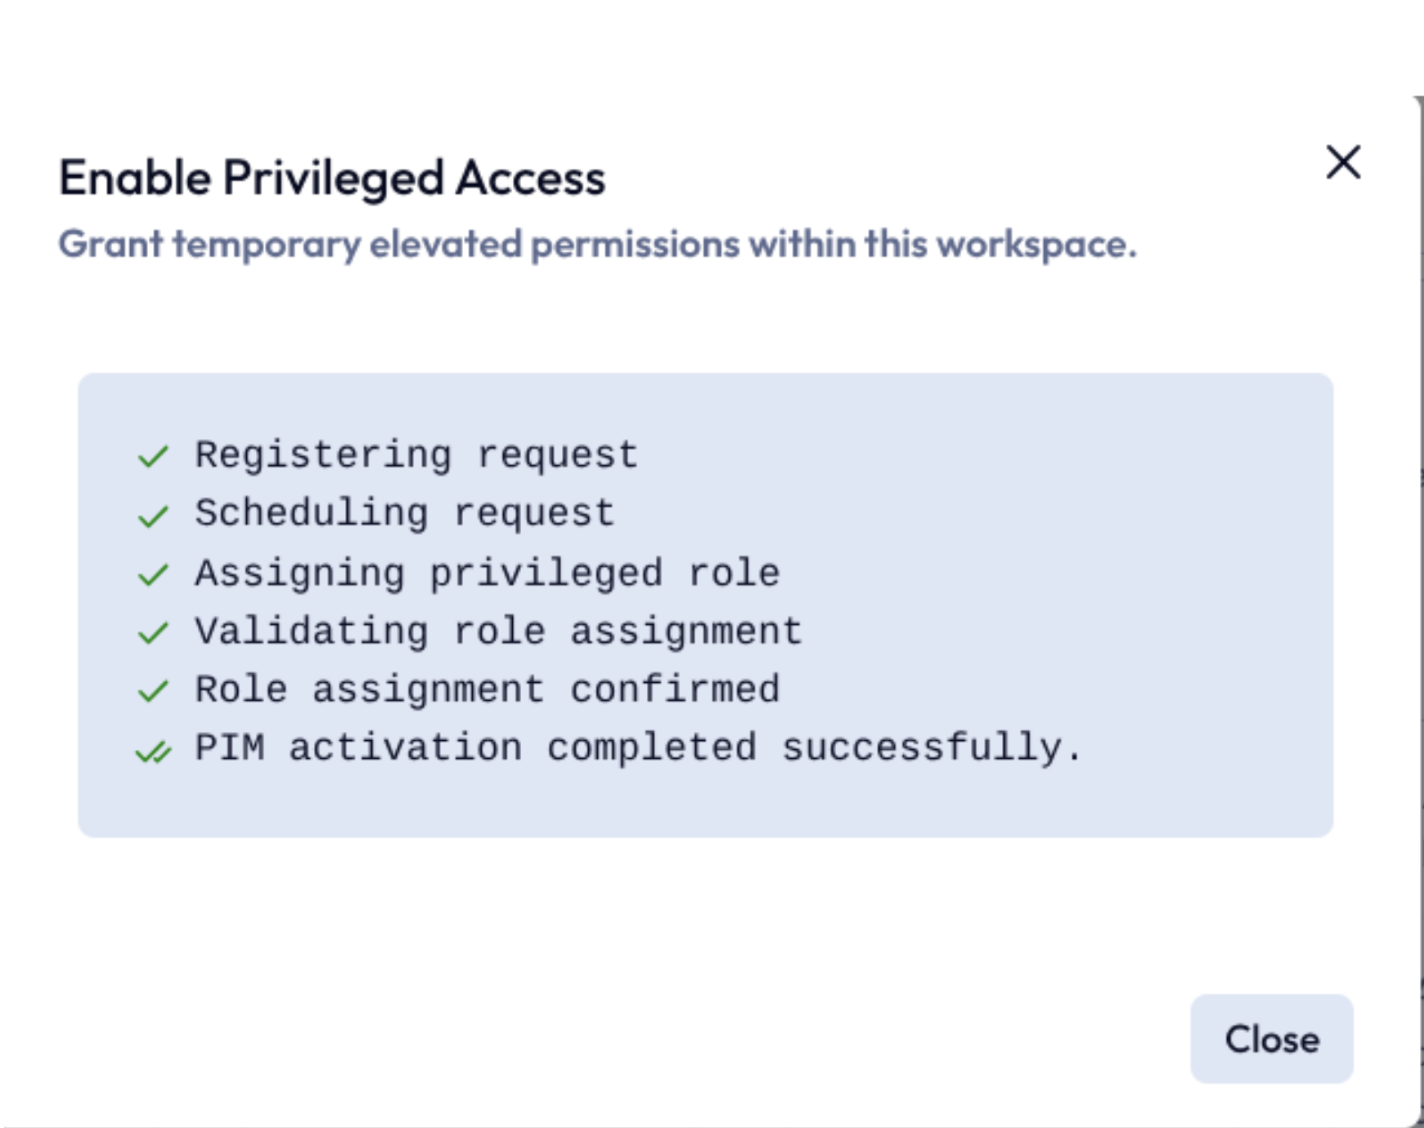
- Once the role is assigned, you can use the link Open workspace to navigate to the workspace
Revoke your elevated access at any time
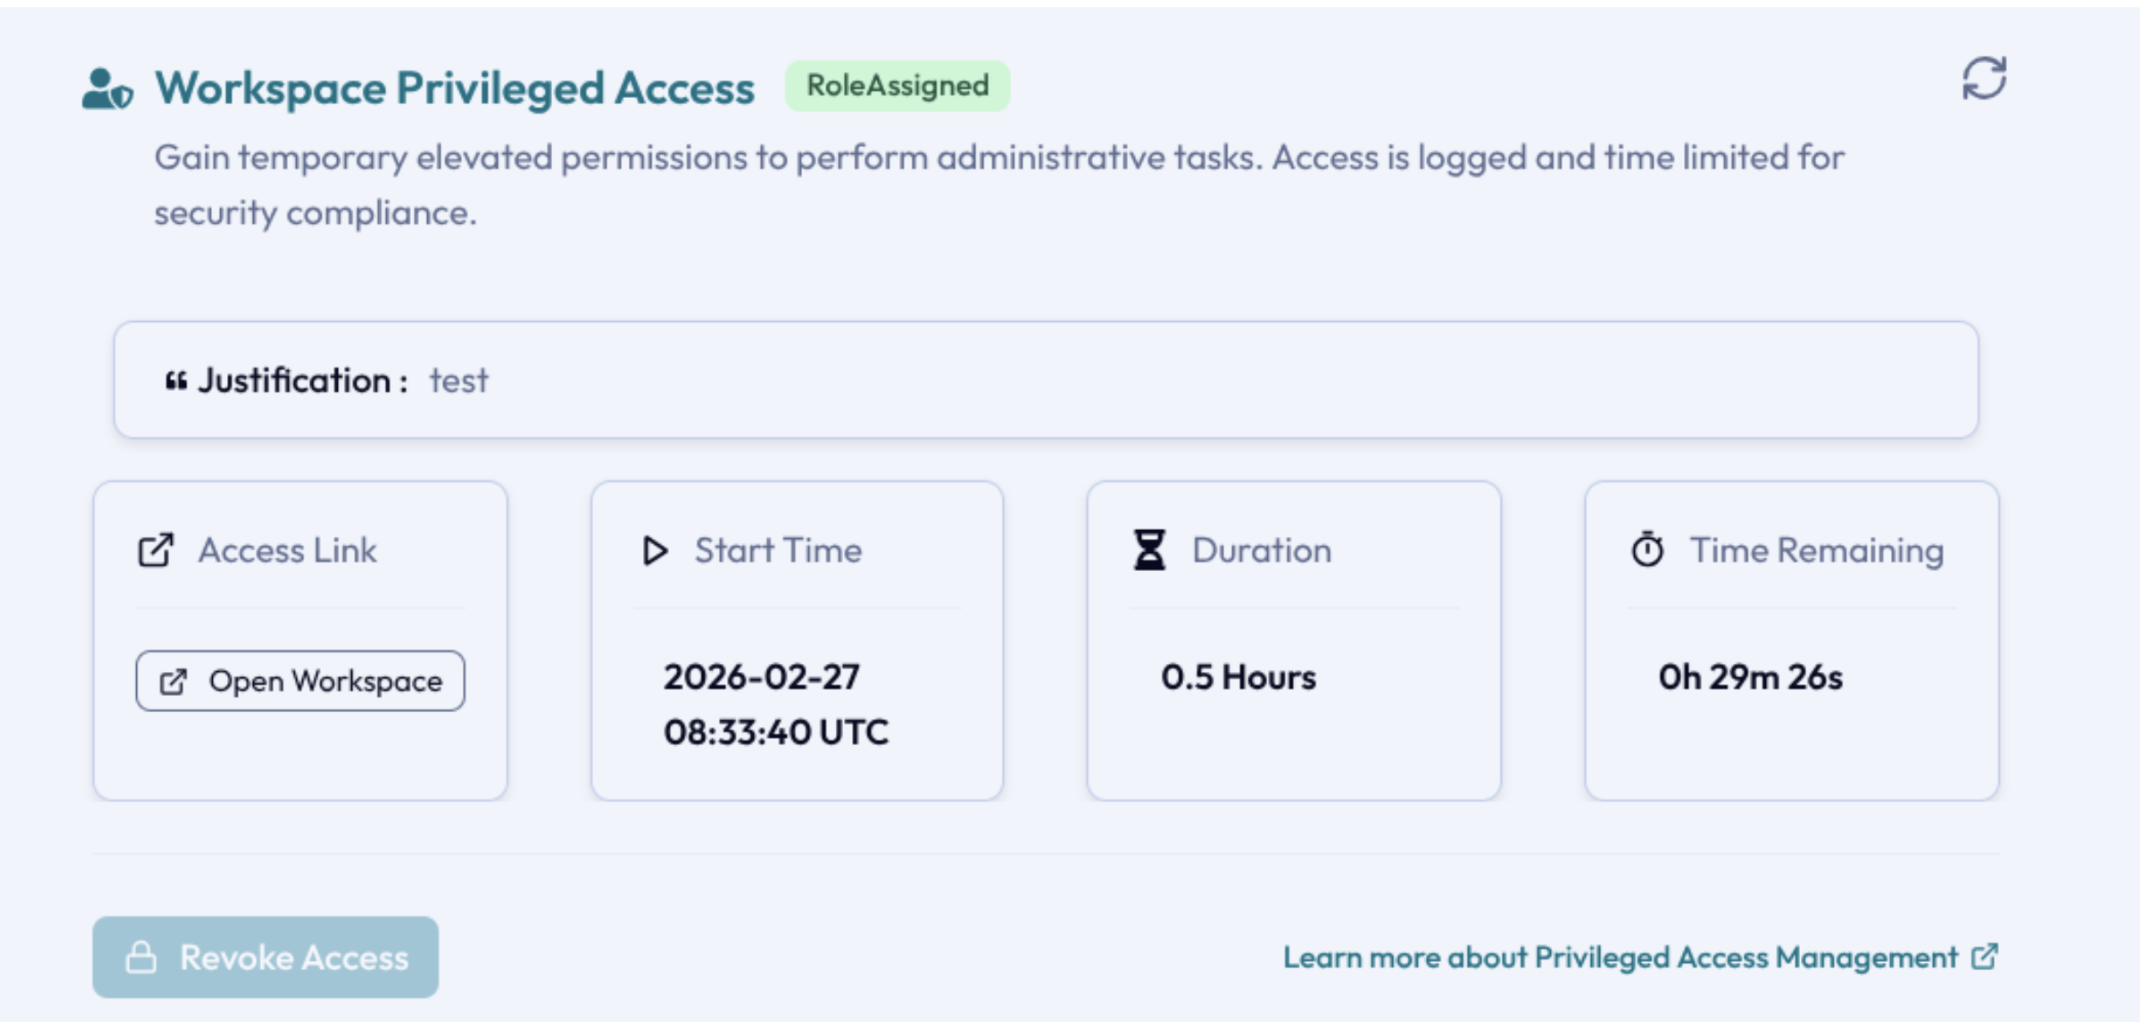
You can revoke your elevated access at any time from the same screen by selecting Revoke Access (available after 5 minutes); all elevation and revocation actions are logged in the workspace activity feed. If the Revoke Access button is grayed out, please refresh the card using the refresh icon on top of the card.
Important to consider
- Access only when necessary: Request privileged access only if strictly necessary.
- Be aware: Research Support is gaining access to the workspace with a Research Support account (NOT
@mydre.org!) therefore, access to VMs is not possible (please add your@mydre.orgto the workspace in order to perform actions inside the VMs). - Time‑boxed by design: Elevated access automatically expires to prevent lingering privileges and reduce security risks.
- Always document the reason: Include a valid justification (ticket or task ID) to keep a clear audit trail for accountability and compliance.
- Revoke promptly when done: End your elevated session as soon as the task is completed — do not keep it active longer than needed.
- From a GDPR perspective, Workspace Privileged Access Management is an important mechanism to obtain controlled, auditable access to workspaces when necessary, for example in the event of (suspected) personal data breaches that must be reported to the supervisory authority within 72 hours. By enforcing time‑boxed, fully logged elevation, PAM helps the organisation fulfil its legal duty of care.
Instructions for when you see “Request failed with status code 403”
You might occasionally see the message “Request failed with status code 403”. This usually points to one of the situations below and can be resolved quickly.
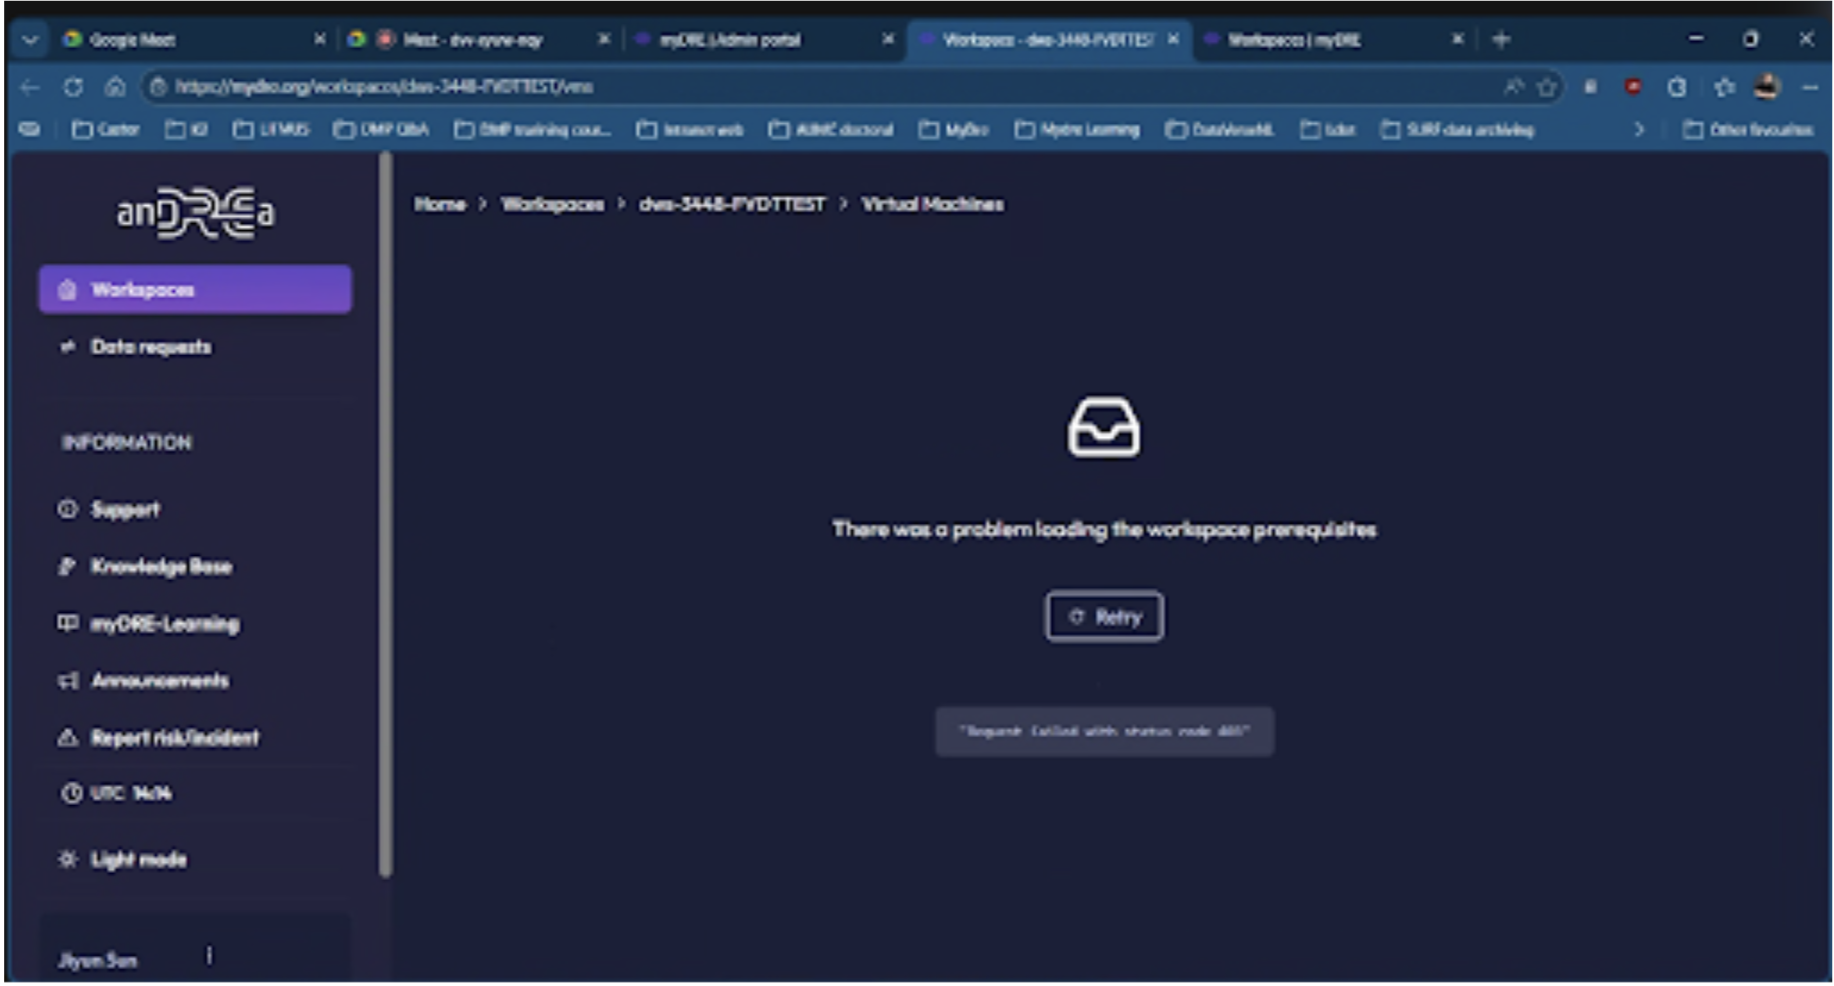
- You are signed in with different credentials than intended.
- Check the lower-left corner of the screen to see which account you are using. If it shows your @mydre account, sign-out and sign-in again with your guest-account credentials.
- Your PAM access period has ended. PAM access is time-limited by design, so simply activate PAM again to regain access.
- Your access has been updated by the Workspace Accountable or Privileged Member. In this case, the change will appear in the Activity Feed in the Admin Portal, and you can coordinate with them if you still need access.