Add an Inbound Security Rule for Central Bastion
Introduction
Some clients are allowed to use our central Bastion for login. But in order for that to work we have to add an Inbound Security Rule to the Network Security Group of the workspace (NOT the VM). This document is a how-to document.
Expiration of this document
When we have a permanent solution. When writing this document Timo is working on a permanent solution.
Video of the how to
Who can do this
Only Andrea!
How-to: user creation request
Step 1: Search for the workspaces subscription
- Log in to Azure.
- Click on: Subscriptions.
- Search for the workspaces subscription of the tenant.
![Azure portal showing the Subscriptions page and the tenant workspace subscription]
Step 2: Search for where you have to add the Inbound Security Rule
- Click on the workspaces subscription of the tenant.
- In the resources group you will see all the workspaces within that subscription.
- Click on: a workspace.
- Click on: Network Security group (of workspace, NOT VM).
- Click on: Settings.
- Click on: Inbound Security Group.
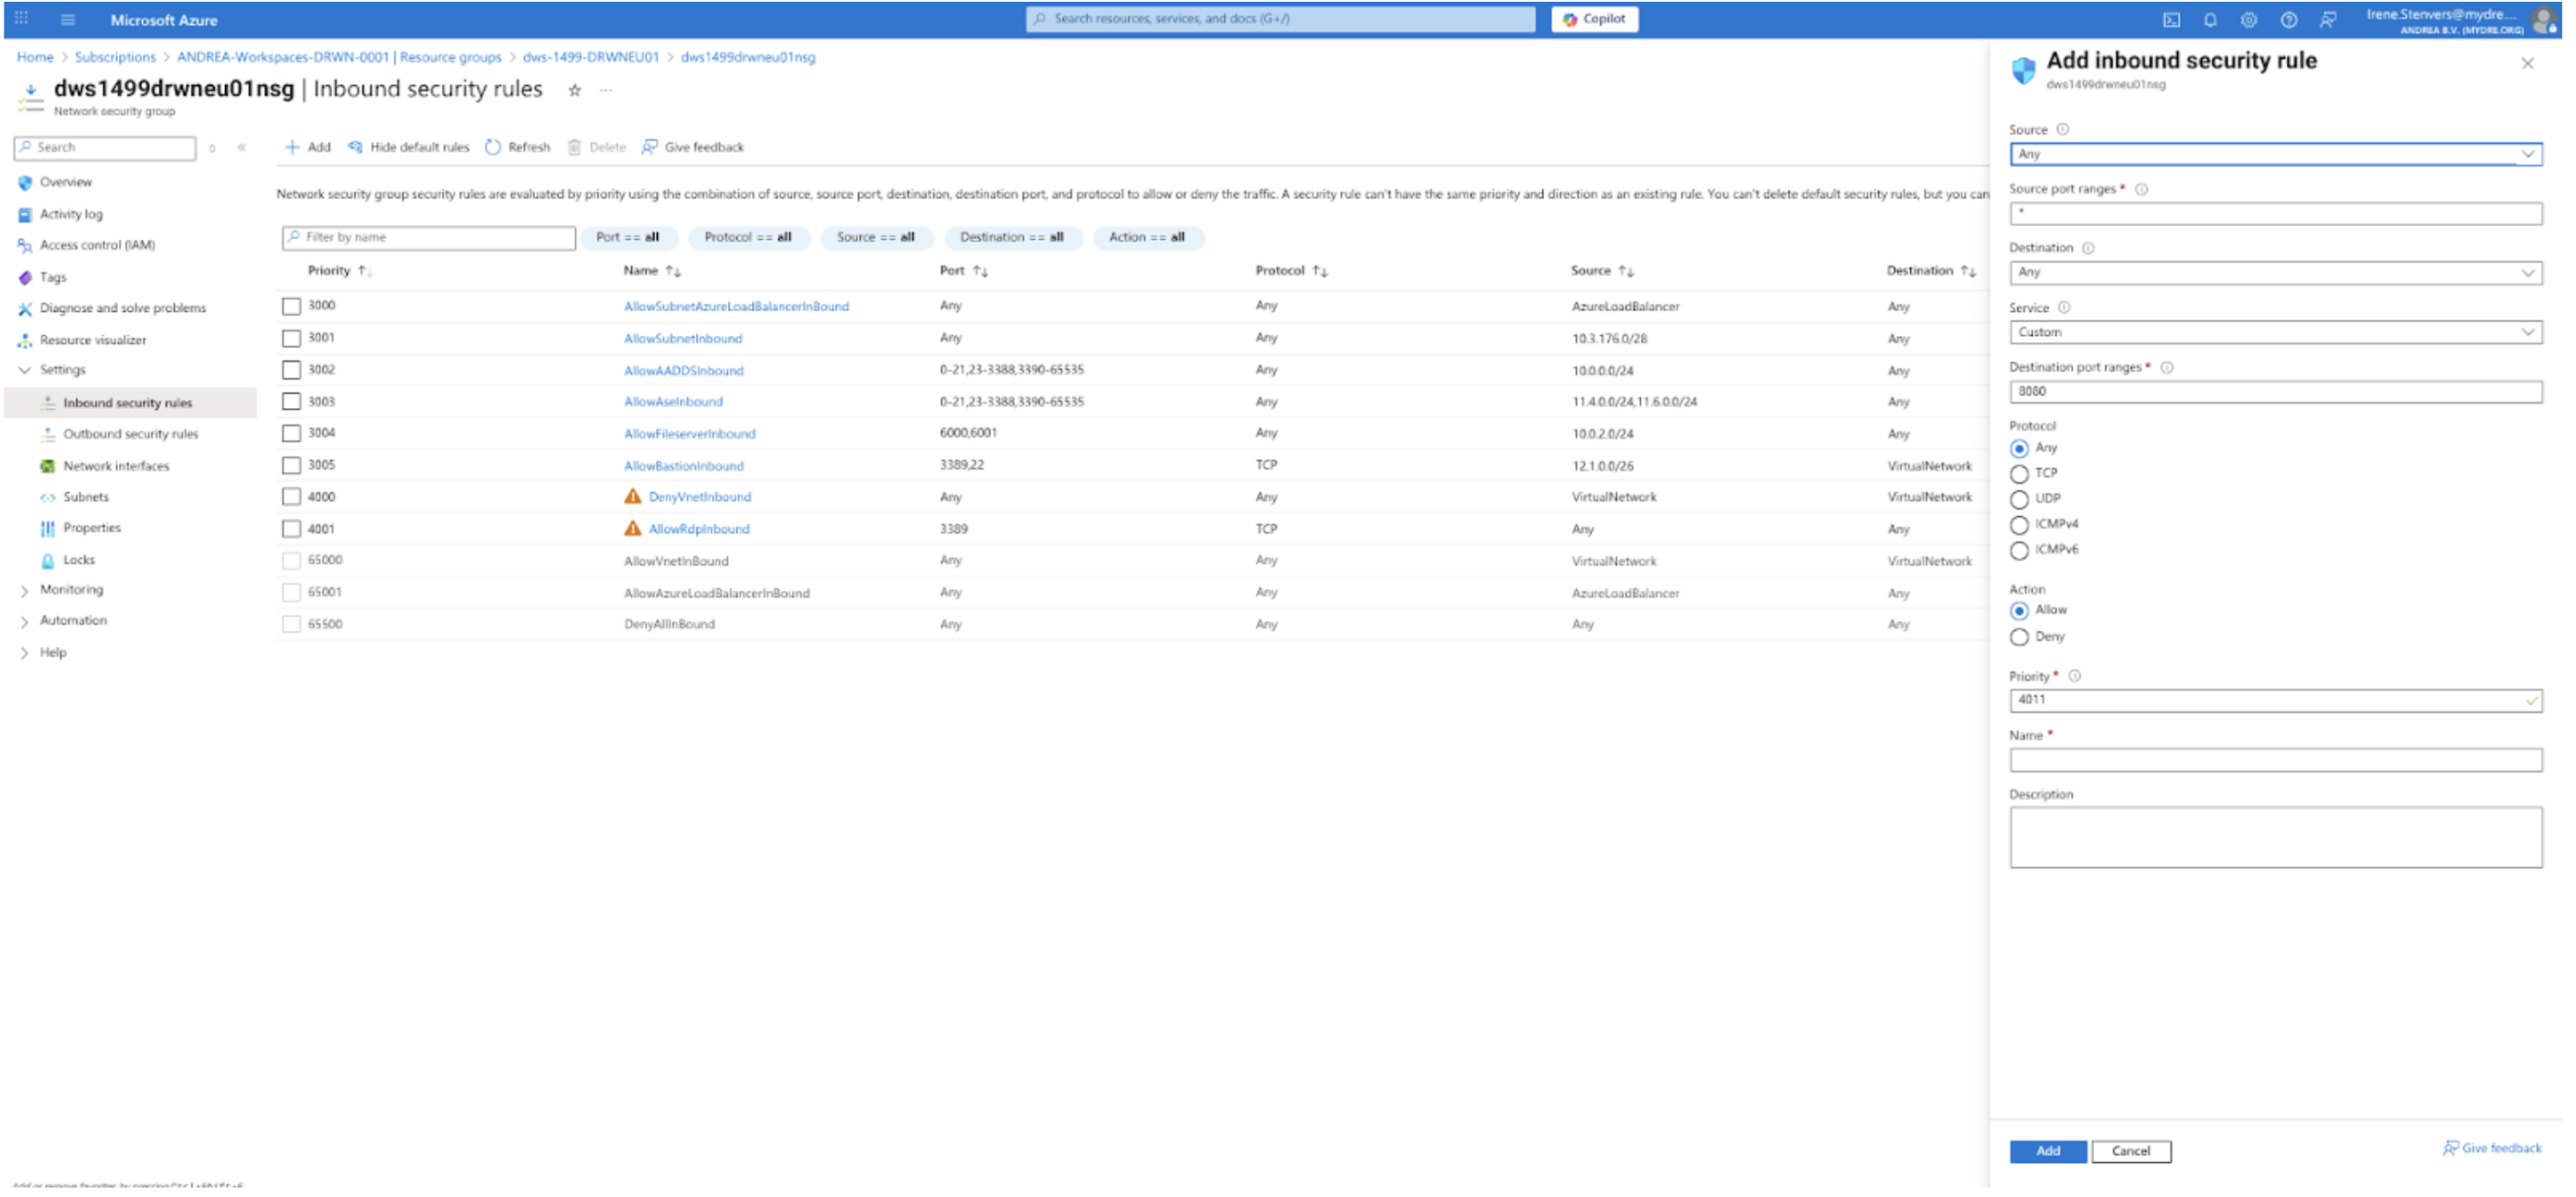
- Here you will see a whole list of rules. Look for the last number in the 3000 range. For example if that is 3004. The rule you are going to add is going to be 2005.
![Workspace Network Security Group showing the Inbound Security Rules list and priority numbers]
Step 3: Add the Inbound Security Rule
- Click on: + Add.
- You will see the following screen.